Part 2: CI/CD, Multiple Accounts, Secrets Management, CDN, VPN, and Monitoring
This is part 2 of a guided tour of a modern production-grade architecture for AWS. In part 1 of the series, we covered the basic components necessary to run an application: network configuration, Kubernetes, microservices, and load balancing. In this post we will cover:
- How to setup a deployment pipeline
- How to isolate access to your environments
- How to manage secrets in your environments
- How to reduce global latency for serving your static assets
- How to connect to your environment
- How to monitor your environment
Deployment Pipeline
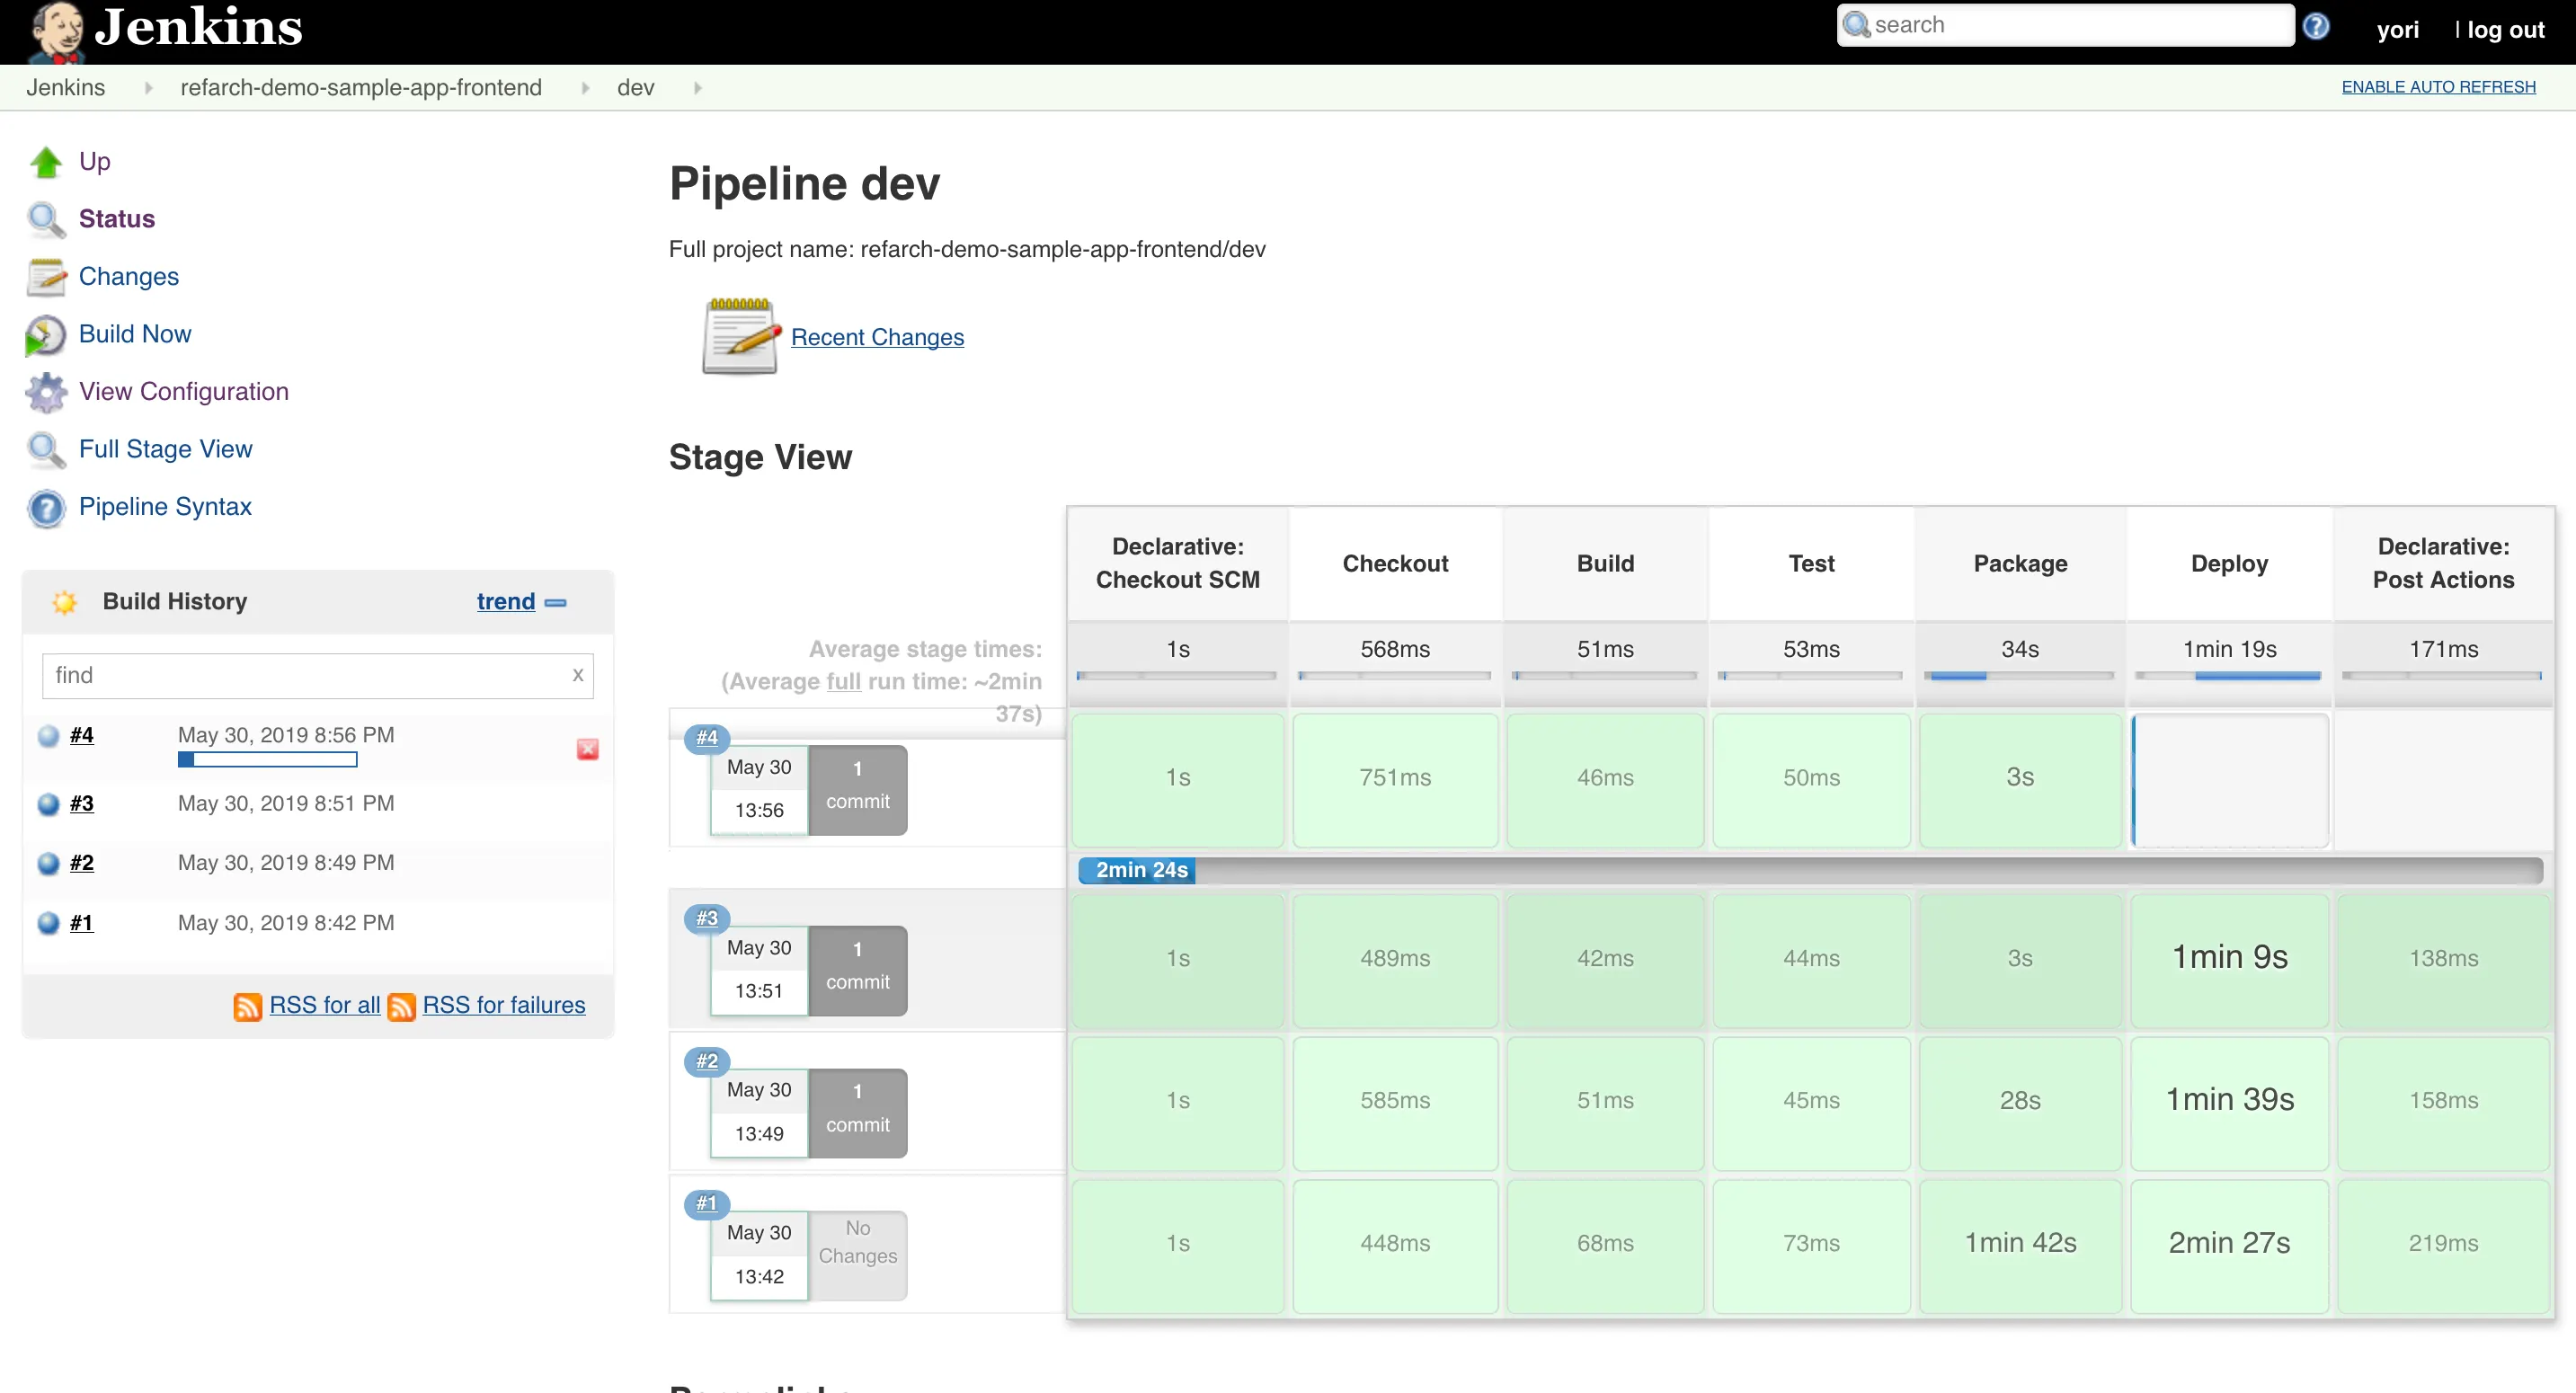
In any production system, you want to be able to iterate fast and deliver features to your end users as they are built. However, at the same time, you want to catch bugs before deployments to ensure that you don’t break customer workflows every time a new release is made (see our post on how agility requires safety). So ideally, you want an automated deployment pipeline that automatically tests every update, and only deploys when the tests pass. This is what Continuous Integration and Continuous Delivery (CI/CD) is all about.
In this setup, the pipeline will do the following for containerized applications. On every commit, a CI server (e.g Jenkins, CircleCI, TravisCI, etc) will:
- Build the application
- Run the automated test suite for the app
- If the tests pass: build a new Docker image and tag with the commit sha
- Publish the image to a Docker registry, such as ECR or Docker Hub
- Deploy the new image to the staging environment
Once the image is deployed to staging, you can then run further manual tests and feature verification that are difficult to automate. If bugs are found on staging, you can continue to commit the fixes to auto deploy to the staging environment.
Note that each deploy to staging is of an immutable, versioned artifact generated in the build process above. This means that when you are satisfied with how things look on staging, you can promote the* exact* code that was running on staging to production by deploying the exact same version.
To facilitate this, your pipeline should support triggering the production pipeline from a new tag or branch of that same commit, when it is ready. When that new tag or branch is created, the pipeline can:
- Take the associated image of the commit
- Deploy the image to the production environment
The key idea here is that you want to use branching strategies that help distinguish between automated deployments to your pre-production environments and production environments. This ensures that sufficient testing and manual verification steps can be included in the pipeline.
Isolating Access to Your Environments
In the previous post we covered leveraging VPCs to isolate your environments at the network and infrastructure level. Here, we cover how to handle access control to your environments.
To ensure full isolation, you should divide your environments separately into their own AWS accounts: e.g if you have a dev, stage, and prod environment, each of those would be their own AWS account with their own IAM entities. Each of the accounts are children of a main account, so that you can consolidate billing to the main account. Separating the environments using accounts has numerous advantages. To name a few:
- Better security posture. Someone getting access to pre-prod is much less likely to be able to touch prod when they live in separate accounts than if they are in the same account.
- Smaller blast radius. Someone who accidentally messes something up in pre-prod is much less likely to have also broken prod.
- Easier permissions model. It is much easier to reason about permissions as “granting access to dev means granting access to the dev account,” as opposed to worrying about setting up the right IAM policies to restrict by tags, and introducing new problems like properly tagging the resources every time you deploy something.
- Optimizing resources by account level limits. There is no need to worry about launching too many dev instances, and triggering an AWS limit that prevents prod from scaling up, because the environment resource limits are isolated by account.
- Isolated billing. You can cleanly separate production costs from R&D costs by looking at the billing of each individual account. Again, it is much easier to slice the billing by account than it is to use something like tags.
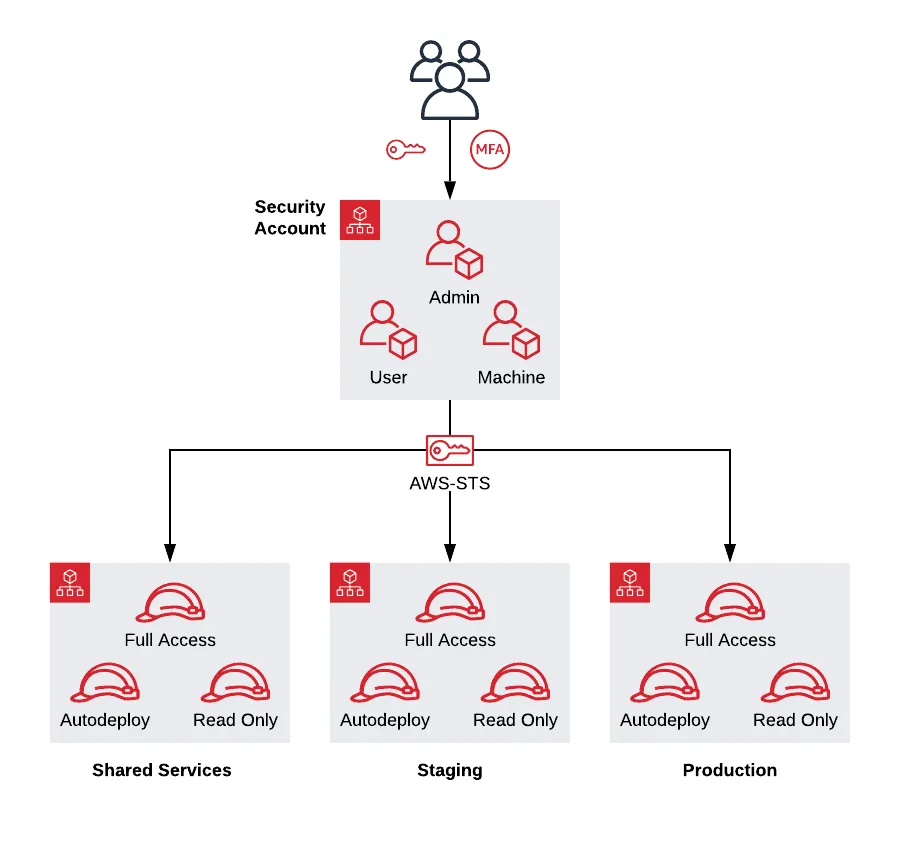
We recommend including 4 accounts at a minimum:
- Security: The entry point for all access. This is the account where your users are defined.
- Shared Services: Any infrastructure that is shared across your environments (Docker Images, AMIs, CI/CD) are deployed here.
- Dev, Stage, Prod, etc: Your pre-prod and prod environments. These environments are typically clones of each other, with the only difference being that pre-prod usually has smaller/fewer servers to save money.
Each new environment you want to support should be its own account, depending on your isolation needs.
The Security Account
The purpose of the security account is to act as the bastion entrypoint into your environments. All IAM users are set up in the security account: you do not directly authenticate to the other accounts. Instead, to access another account, you assume IAM roles in each account that grant different permissions. For example, if someone in your organization wanted to access the staging environment, they would first authenticate to the security account, and then assume a role that further grants them permissions in the staging environment (e.g a full-access role in the staging account that grants admin level permissions in that account). Then, access control is managed by which roles the user is allowed to assume from the security account.
This setup has a number of advantages:
- Simplified access management. Onboarding and offboarding users is now easy: you add or remove the user from the security account, and there is no need to touch the other accounts.
- Better UX. Users only need to manage one set of login credentials, MFA tokens, and access URL for accessing AWS.
- Centralized authorization. As long as you don’t grant any IAM permissions in the security account, there is no way for someone to use the IAM APIs to arbitrarily escalate their privileges across accounts.
- Isolated authorization. Granting IAM admin status in the dev account only grants full access to the dev account: that user can not escape into the stage account if they don’t have the permissions to assume the role in the security account.
The Shared Services Account
The purpose of the shared-services account is to act as a centralized holder of artifacts, such as AMIs and Docker images. This comes from the philosophy of “Immutable Infrastructure,” where you want to treat your infrastructure as immutable assets that are idempotent. Using version 1.0.5 of an AMI, should be the exactly the same, whether deployed today, or 6 months from now. This gives you predictable outcomes in your deployment process, making it more robust and reliable. Additionally, having a shared repository of immutable artifacts allows you to promote exact versions of the code across environments: e.g you can take the vXXX tag of a Docker image that was heavily tested in staging, and then promote it by deploying that exact image to production.
The shared services account should also hold any management and operations servers that are shared across all the environments. Jenkins, for example, should be deployed in the shared services account.
Dev, Stage, Prod, etc
Each environment should have its own account. At a minimum, you should have at least one pre-prod environment (typically called staging) and the production environment.
Staging is a pre-prod environment for release testing. Release candidates and features should be deployed and thoroughly tested in the staging environment before it is pushed to production.
The production environment should be where all live services should be deployed. Anything that is consumed by an end user should be in the production environment.
Optionally we recommend supporting a dev environment as well. Dev is primarily used for sandboxing. This is the environment that all developers should have access to for testing their code during development. Having a developer sandbox provides a safe place for your developers to test infrastructure changes, allowing for better safety of the released code.
Authentication and Authorization
Using multiple accounts has many advantages as stated above, but it does not come for free. Using multiple AWS accounts introduces complexity to your authentication and authorization strategy. Switching between accounts, especially on the CLI, is cumbersome and painful. Similarly, managing VPN certs and SSH access across all the accounts is tough.
There are numerous ways to address. You can refer to our blog post series, Comprehensive Guide to Authenticating to AWS on the Command Line for a list of options specifically for authenticating to multiple accounts in a shell.
For the other interfaces (SSH, VPC, AWS Console), you could use Gruntwork Houston. Gruntwork Houston is a single tool that provides a unified, streamlined authentication experience to the AWS Console, API, CLI, VPN, and SSH, with first class support for SSO. Take a look at our product demo for a preview of the experience. A lot of the complexities of a multi-account setup goes away by leveraging Houston.
Secrets Management
Every application contains secrets, such as passwords and credentials used to access data stores and third party services. One effective way to store secrets is to use encrypted config files. The idea is to put the ciphertext of the secrets directly into your version control system so that the secrets are versioned, code reviewed, tested, and deployed exactly like the rest of your code. The advantage of this is that you can treat your config and secrets as code. By putting secrets in your code, every secret change goes through your full CI/CD pipline and all changes are versioned with your app.
One of the simplest approaches to encrypted config based secrets management is to use AWS KMS for encrypting the secrets, with each environment getting its own KMS key. The encrypted cipher texts are then stored in a config json that is decrypted at boot time inside the application container. This allows you to control which environment secrets the container has access to based on which IAM roles are bound to the container environment.
You can use various tools to facilitate this process. For example, suppose you wanted to store a database config and encrypt the password. Consider the following config file for your application:
{
  "host": "postgres.internal",
  "port": 5432,
  "username": "dbuser",
  "password": "password"
}
If you use gruntkms, a KMS encryption tool included in the IaC library, you can encrypt the password in the command line:
$ echo "password" | gruntkms encrypt --aws-region us-east-1

kmscrypt::AQICAHji/SJGsf0XCu+n1uyMoJKMW3tUQtjMj5WKnrh5V478+wGO2JqydgczH0apc/xkAOwgAAAAfjB8==
This ciphertext can then be directly pasted into the config for the password field:
{
  # Snipped for brevity
  "password": "kmscrypt::AQICAHji/SJGsf0XCu+n1uyMoJKMW3tUQtjMj5WKnrh5V478+wGO2JqydgczH0apc/xkAOwgAAAAfjB8=="
}
You can then decrypt this json file directly using gruntkms (note how gruntkms decrypts just the ciphertext parts, leaving all the plaintext parts unchanged):
$ cat config.json | gruntkms decrypt --aws-region us-east-1
{
  # Snipped for brevity
  "password": "password"
}
The idea is that the secrets are encrypted during development, and checked into the code base. This is then decrypted by the application at run time during the initial boot up phase. This allows you to securely manage the secrets as code.
Here we showcased how to use gruntkms, but there are other tools you can try out there that support similar semantics, such as sops and shush.
An alternative to encrypted config based secrets management is to use a service that acts as a secrets broker. Some options include AWS Secrets Manager, Kubernetes Secrets, and Hashicorp Vault. Each of these have separate pros and cons, but in general using a broker simplifies operational aspects of secrets management such as rotation, access control, authorization, encryption configuration, etc. Some disadvantages of using a broker come from more complex application code to authenticate and communicate with the broker, as well as the overhead of managing additional infrastructure and configuration.
CDN for Reducing Latency of your Static Assets
In a globally distributed environment, it is important to limit the latency of accessing your static contents (CSS, JS, images, etc). Many modern applications (e.g think single page apps built on Angular or React) contain megabytes of client static assets that are required for using the application, which can be a challenge to maintain in a global context.
To reduce latency of accessing your static assets, we recommend using a CDN like AWS CloudFront for serving them. A CDN is a global network of servers that are optimized for serving static assets from a location that is closest to the end client. Not only does this help the end client, this also reduces network load on your systems by offloading static content serving from your servers.
Connecting to the Internal Network
If you recall from the network configuration described in the previous post, many components in this architecture are insulated from the public internet (Defense in Depth). While this ensures your important components are protected, it adds operational complexity to managing those components.
You can use a bastion host or a VPN server for accessing the internal network:
- A bastion host is a publicly accessible server that is internal to the network. The server should only run a SSH server. All access to the network is done using SSH port forwarding.
- A VPN server allows routing all network traffic of a client machine through to the internal network over a secure, encrypted connection. This requires a specialized client on the user machines to work.
In general, using a VPN server is preferred as once you’re connected to the VPN server, you are “in the network” and can access private resources, such as SSHing to servers or opening internal URLs in a browser. While bastion hosts are operationally simple, they require more steps to use to connect to resources in the network (you have to open a tunnel, you have to hop SSH connections, you need to setup a SOCKS proxy to use with a browser, etc).
In both cases, the server should be deployed into the management VPC, so that you only need a single access point into the various network layers of the environments.
Monitoring Your Environments
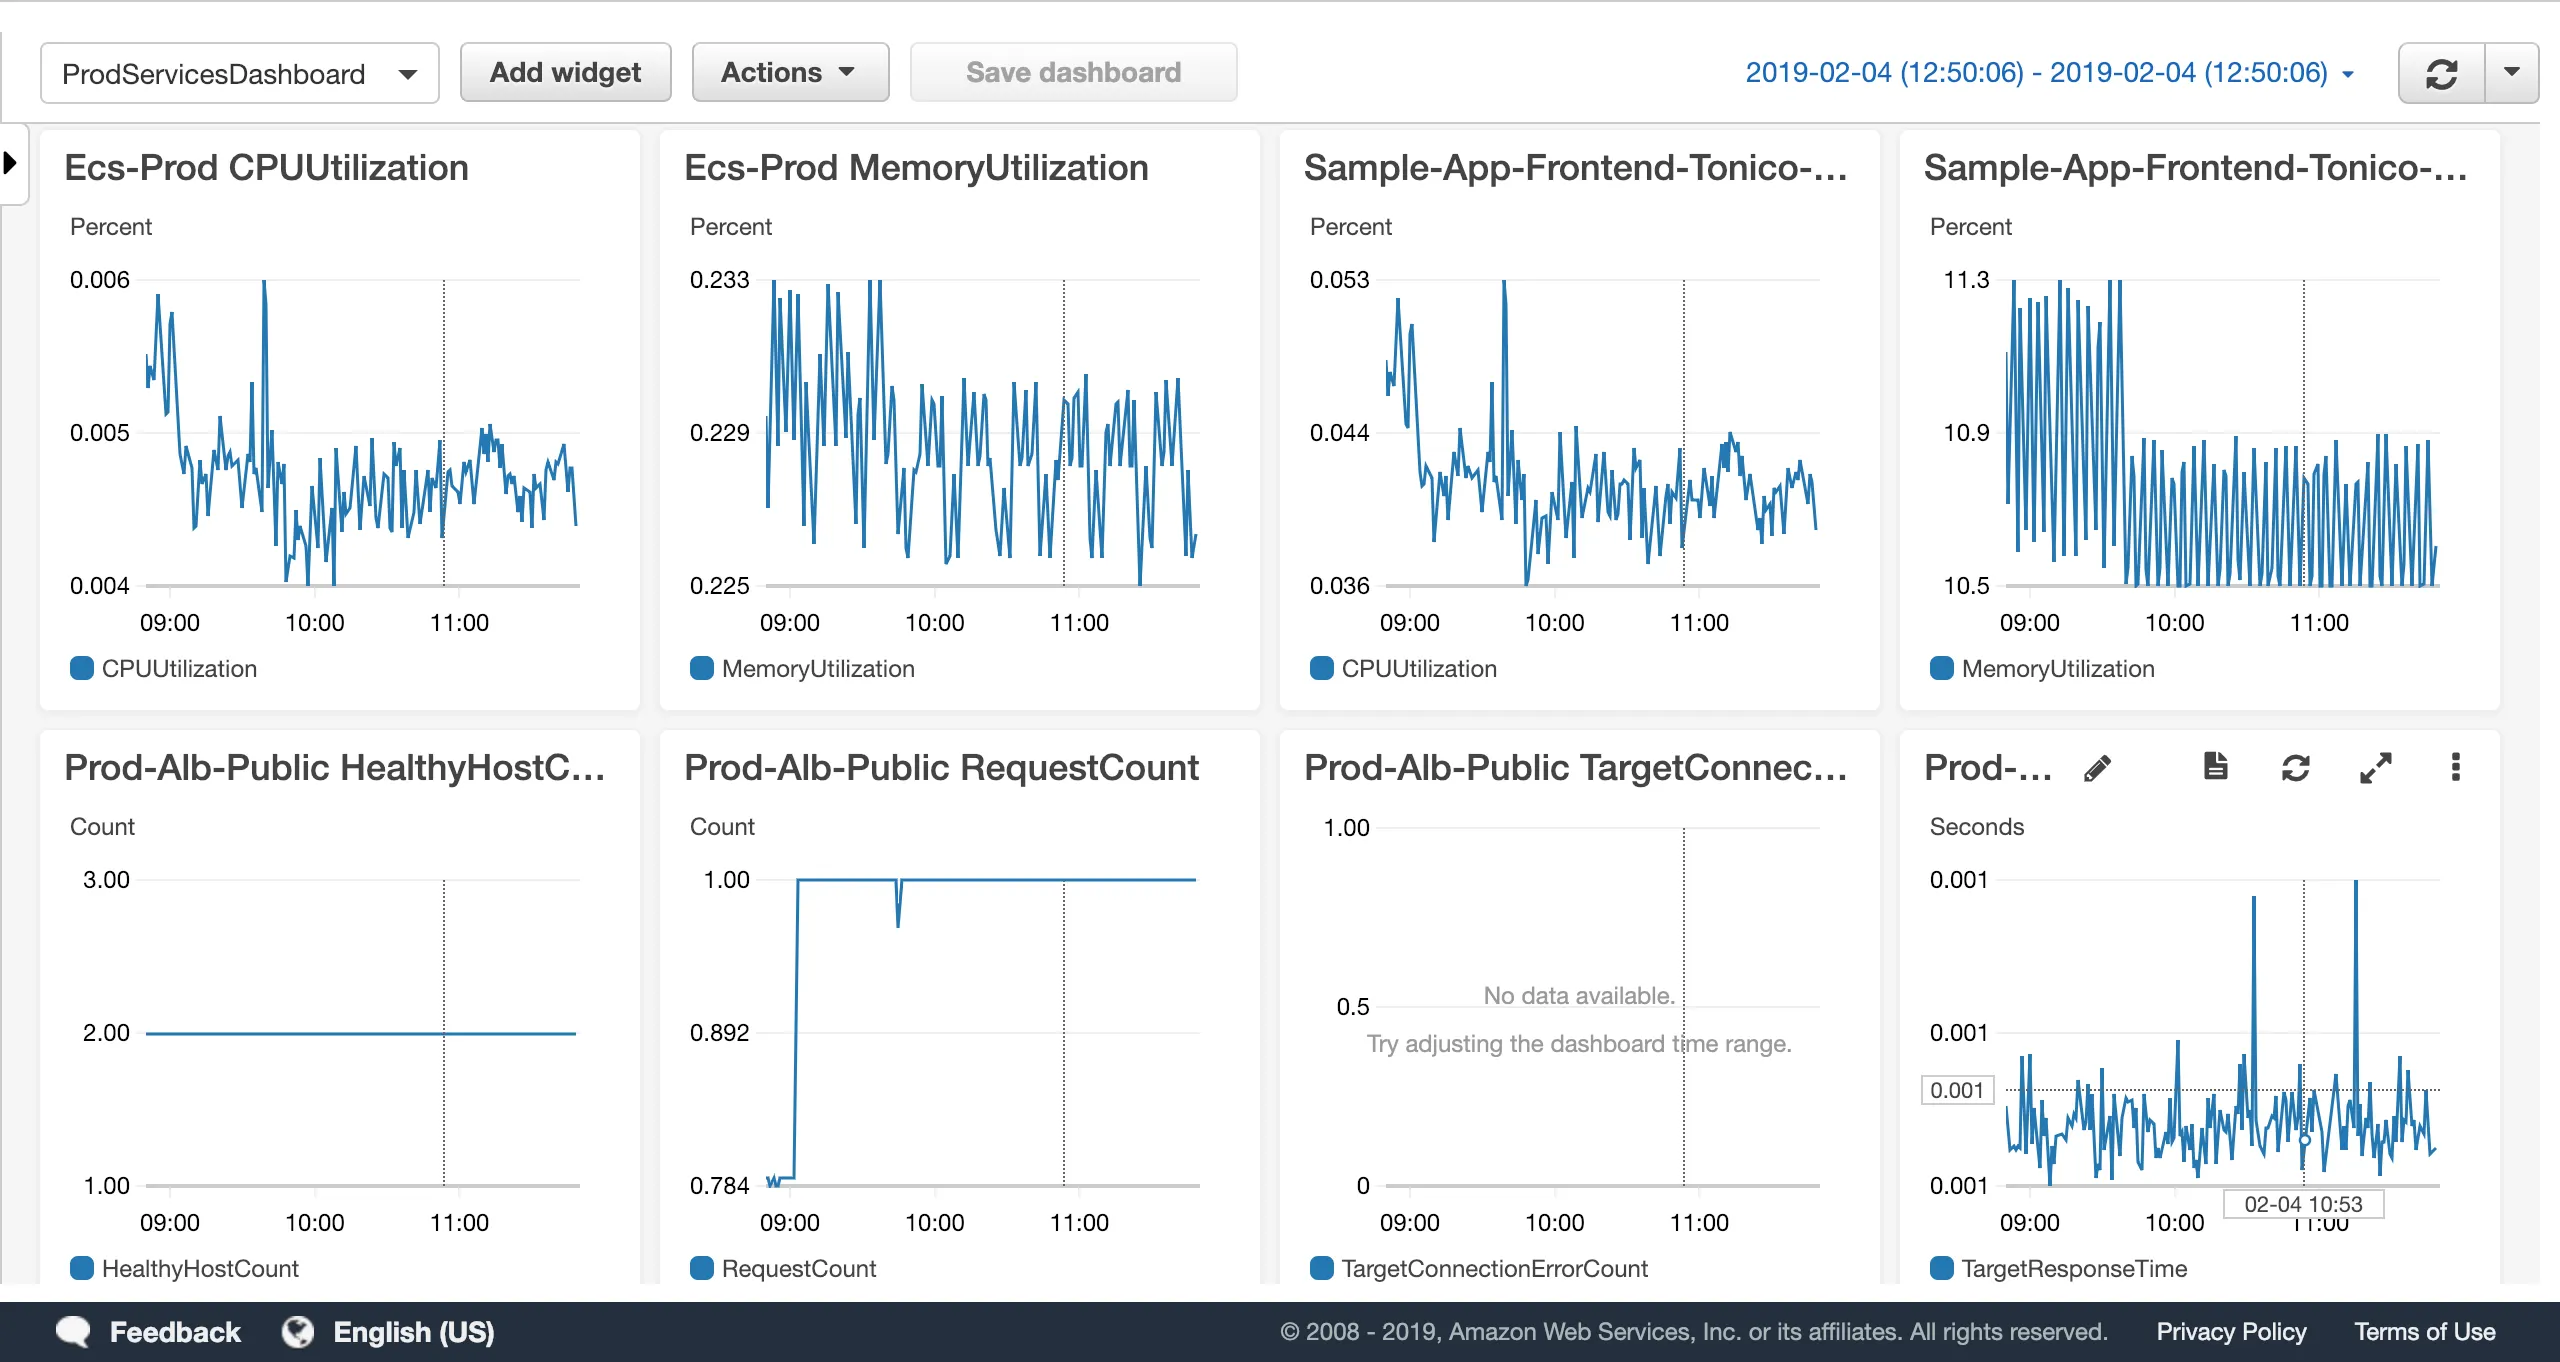
An important tenet of production-grade infrastructure is the ability to know what is going on with your deployed components. You want to be able to see things like:
- Instance level metrics: CPU, Memory usage, Disk usage, etc
- RDS performance metrics, including query performance
- Server logs, including server access logs and login attempts
- Container application logs
In AWS, you can use CloudWatch as an easy way to fulfill your monitoring needs. The biggest advantage of using CloudWatch is that you don’t need to run any additional piece of infrastructure to centralize all the information in one place. Handling monitoring data is extra difficult since it has very strict up time guarantees (you don’t want to miss anything), and the data is explosive (lots of logs and metrics that come in every second), so the more you can offload the better.
You can use CloudWatch for centralizing:
- Metrics and graphs
- Dashboards
- Log entries, including a search and aggregation interface (Insights)
- Alarms and notifications
Infrastructure as Code
Up to this point, we covered all the different concerns you might have in running your application in a production capacity. For each concern, we suggested which AWS components you can use to address those needs, and for some how to configure them.
This is a lot of infrastructure to manage across many environments! Manually creating each infrastructure by hand through the console or direct API calls, would be a tedious, long, and error prone process. Imagine doing that for each new environment you need to spin up. How can you manage all this infrastructure in a sane manner?
The answer is to define your infrastructure as code using one of the many tools that support it (see our post on Why we use Terraform and not Chef, Puppet, Ansible, SaltStack, or CloudFormation). When you do so, suddenly you can reuse code written and tested by other people in the industry to define, provision, and manage your infrastructure. Leveraging a reusable library of infrastructure allows you to bootstrap the process of setting up all of these components with all the production concerns addressed in a relatively short period of time.
How to get started
One of the benefits of defining your infrastructure as code is that not only can you reuse code that you wrote yourself, but also code written by others. In most cases, a large portion of the infrastructure is similar across companies and products. Most applications need a database, most applications need monitoring and logging, most applications want isolated pre-production and production environments, etc. You don’t need to reinvent the wheel and start from scratch every time.
In the next and final post, we cover how the various products offered by Gruntwork provides a starting point for your infrastructure that can be deployed in about a day, with room to customize the infrastructure to suit your needs.
Your entire infrastructure. Defined as code. In about a day. Gruntwork.io.


- No-nonsense DevOps insights
- Expert guidance
- Latest trends on IaC, automation, and DevOps
- Real-world best practices