Introducing a set of open source modules for the TICK stack
Today, we’re pleased to announce that, in partnership with InfluxData, we are open sourcing terraform-google-influx, a set of reusable infrastructure modules that make it easy to deploy and manage the TICK Stack (Telegraf, InfluxDB, Chronograf, Kapacitor) on Google Cloud Platform (GCP). These modules are built for use with Terraform and Packer and we’ve releasing them under an Apache 2.0 license on GitHub and in the Terraform Registry!
These modules give you an easy way to start collecting and analyzing time series data on GCP, including server metrics, application performance metrics, network data, sensor data, and data on events, clicks, and market trades. We released an analogous set of modules for running the TICK stack on AWS last year, and we’re excited to bring this offering now to GCP. In this blog post, we’ll walk you through how to use these modules to get the TICK stack running in your GCP account in just a few minutes.
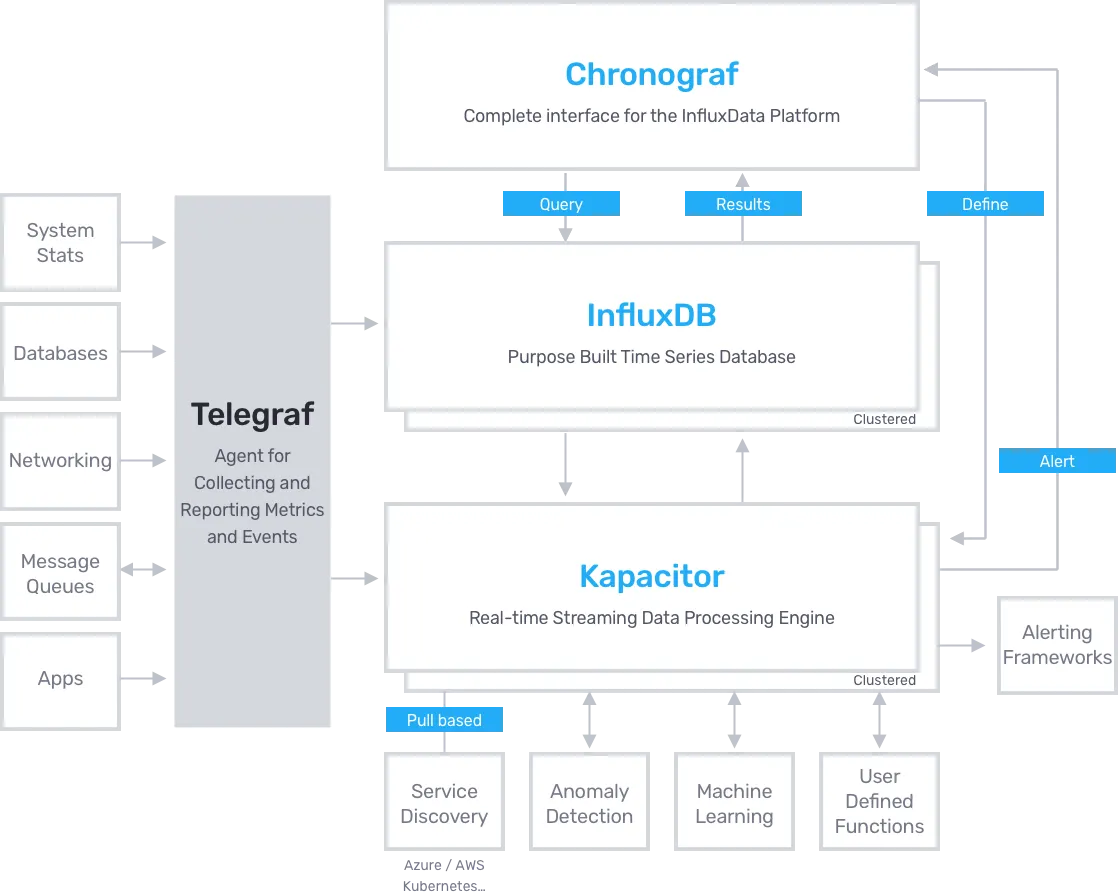
What is the TICK Stack?

- Telegraf: An agent you run on your servers or as a Docker side car to collect and send metrics to InfluxDB. Telegraf’s plugin architecture supports collection of metrics from 100+ popular services right out of the box.
- InfluxDB: An open source, enterprise grade, distributed time series database, optimized for time-based streams of data, metrics and events.
- Chronograf: A UI layer for the whole TICK stack. Use it to set up graphs and dashboards of data in InfluxDB and hook up Kapacitor alerts.
- Kapacitor: A metrics and events processing and alerting engine. Use it to crunch time series data into actionable alerts and easily send those alerts to many popular products like PagerDuty and Slack.
Running TICK Stack OSS on a single compute instance
The easiest way to try out the TICK stack is to spin up a simple example from the terraform-google-influx repo that deploys the entire stack on a single compute instance. This runs the open source stack, so you don’t need a license to try it out.
Step 1: Build a custom machine image
Before deploying the solution, you need to use Packer to build a custom machine image containing all TICK components. As explained in the documentation, here’s how you build the TICK OSS image:
git cloneterraform-google-influxrepo to your computer.- Install Packer.
- Set
GOOGLE_CREDENTIALSenvironment variable to local path of your Google Cloud Platform account credentials in JSON format. - Set
GOOGLE_CLOUD_PROJECTenvironment variable to your GCP Project ID. - Update the
variablessection of thetick-oss.jsonPacker template to specify the GCP region and zone, and InfluxDB version you wish to use. - To build an Ubuntu image for InfluxDB Enterprise:
packer build tick-oss.json.
After the build has finished, note down the ID of the image from the packer build output:
==> Builds finished. The artifacts of successful builds are:
--> gcp: A disk image was created: tick-oss-ubuntu-5d49e18d-1545-c9b3-3a03-5ef4ae8021ce
Step 2: Deploy TICK OSS with terraform
Create a file called main.tf with the following contents:
# PREPARE VARIABLES

variable "region" {
  default     = "us-east1"
  type        = string
}

variable "project" {
  default     = "ENTER YOUR PROJECT ID HERE"
  type        = string
}

variable "image" {
  default     = "ENTER THE ID OF THE IMAGE YOU BUILT HERE"
  type        = string
}

# SET UP PROVIDERS

provider "google" {
  region  = var.region
  project = var.project
}

provider "google-beta" {
  region  = var.region
  project = var.project
}

# DEPLOY TICK STACK

module "tick_oss" {
  source        = "gruntwork-io/influx/google"
  version       = "0.1.0"

  region  = var.region
  project = var.project
  name    = "tick-oss-example"
  image   = var.image
}

# OUTPUT INSTANCE GROUP MANAGER DETAILS

output "tick_oss_instance_group_manager" {
  value = module.tick_oss.tick_oss_instance_group_manager
}
Run terraform init, then terraform apply, and after a few minutes, you should get an output that looks like this:
Apply complete! Resources: 8 added, 0 changed, 0 destroyed.

Outputs:

tick_oss_instance_group = https://www.googleapis.com/compute/v1/projects/your-project/regions/us-east1/instanceGroups/tick-oss-example
tick_oss_instance_group_manager = https://www.googleapis.com/compute/v1/projects/your-project/regions/us-east1/instanceGroupManagers/tick-oss-example
Step 3: Take it for a ride
You can get the public IP address of the instance either by locating the instance in GCP Console, or by executing the following commands:
IGM=$(terraform output tick_oss_instance_group_manager | tr -d '\n')INSTANCE_URI=$(gcloud compute instance-groups managed list-instances $IGM --limit=1 --uri)INSTANCE_IP=$(gcloud compute instances describe $INSTANCE_URI --format='get(networkInterfaces[0].accessConfigs[0].natIP)' | tr -d '\n')echo $INSTANCE_IP
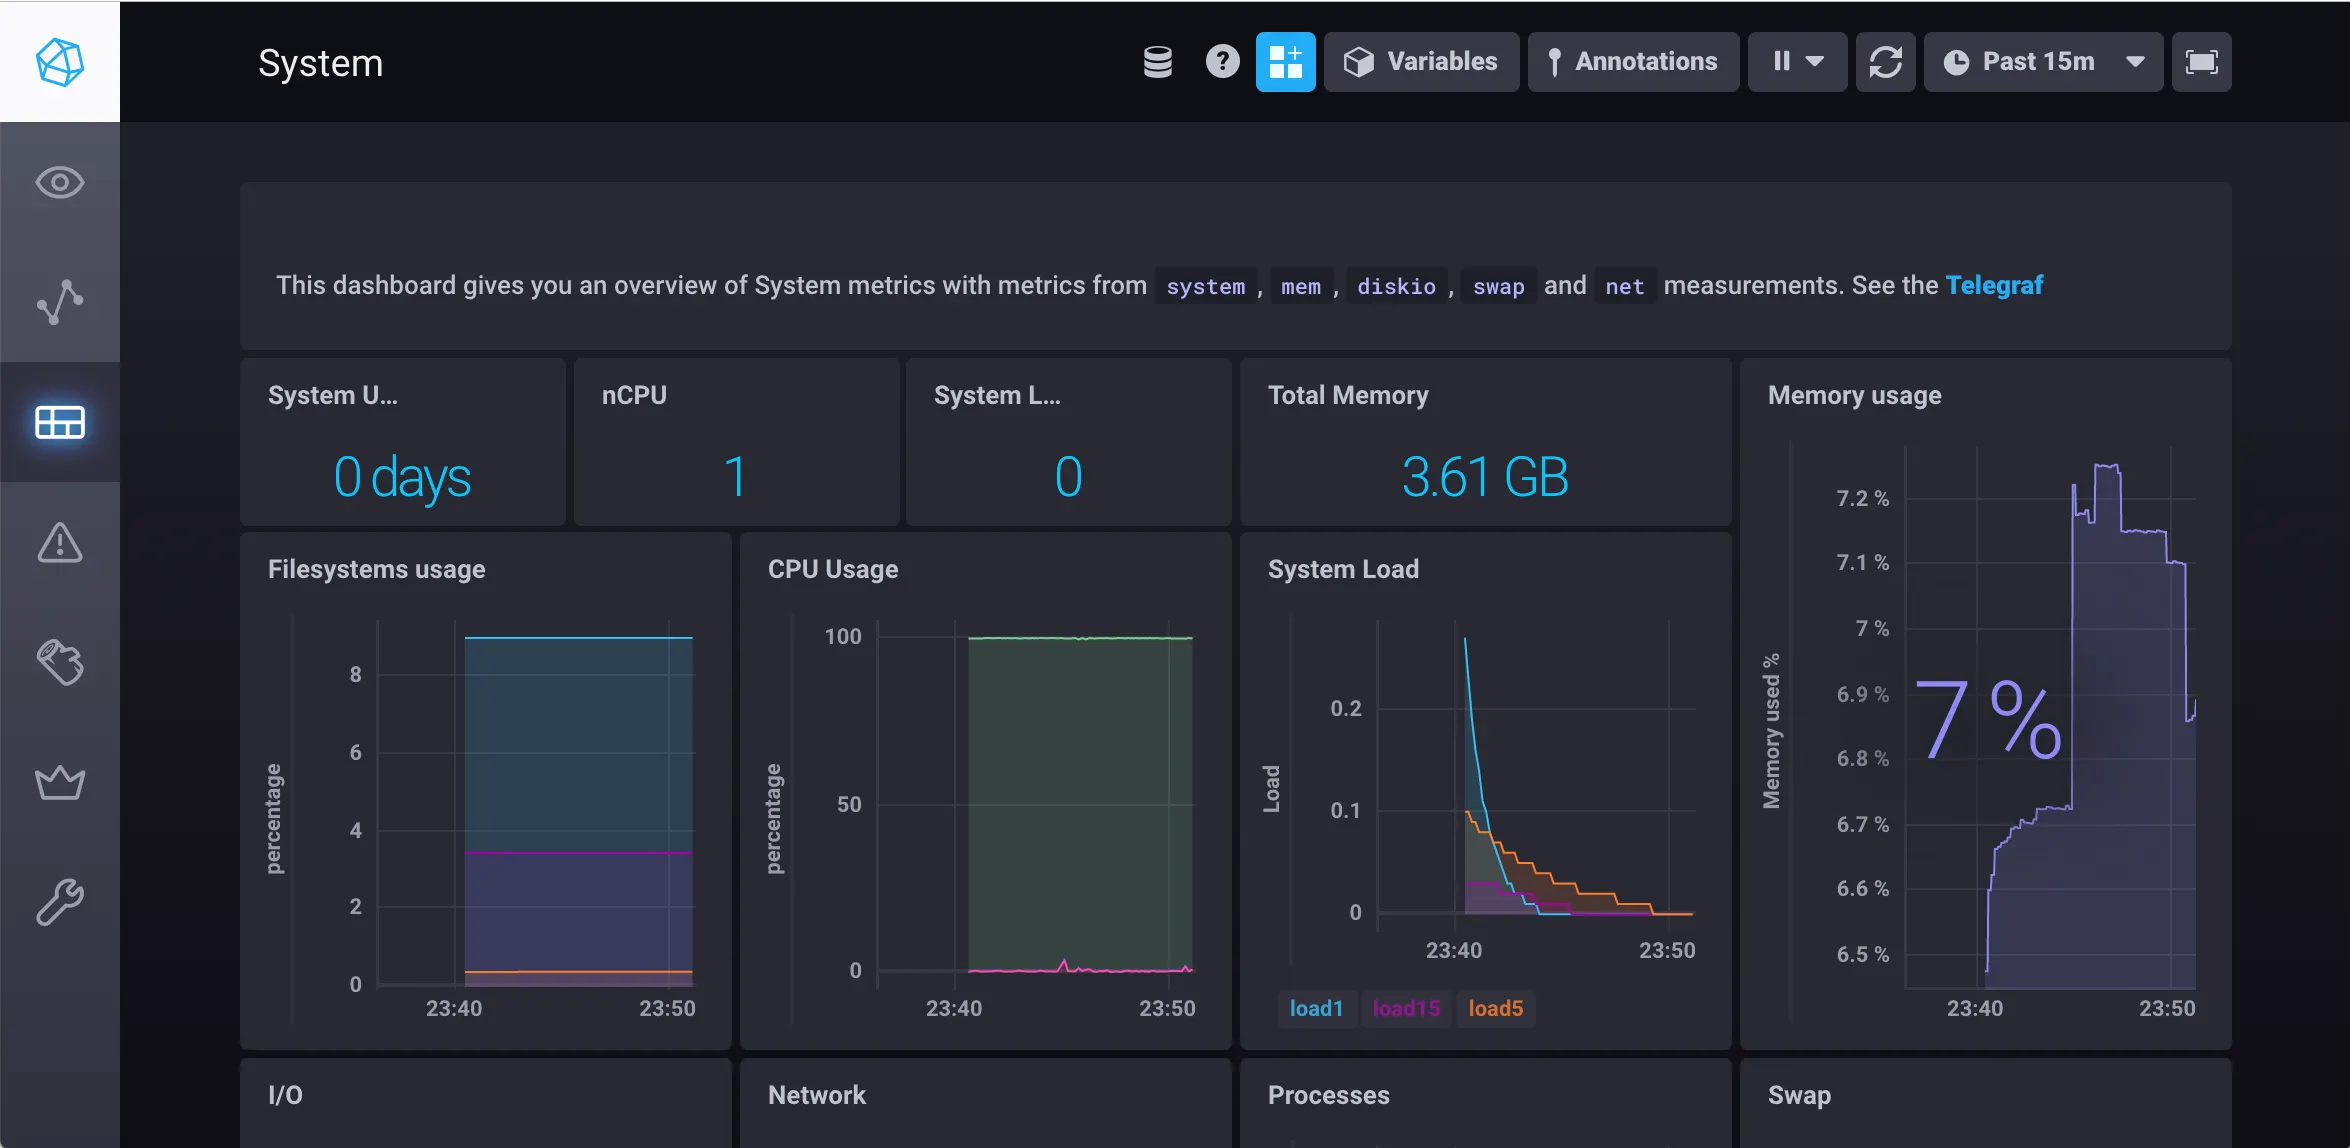
To access Chronograf, open a web browser to the resulting IP address on port 8888 or run open http://$INSTANCE_IP:8888 . When prompted for configuration options, you can accept the defaults (use localhost). Once you're through configuring Chronograf, you have a working TICK OSS Stack running!

The Telegraf agent is collecting and sending data to InfluxDB. The Telegraf database is called telegraf.
Step 4 (Optional): Try out InfluxDB CLI
Install the InfluxDB CLI and run the following command to connect to the cluster:
$ influx -host $INSTANCE_IP
If everything went fine, you should be dropped into an InfluxDB shell and be able to issue InfluxQL commands:
Connected to http://xxx.xxx.xxx.xxx:8086 version 1.7.6
InfluxDB shell version: v1.7.6
Enter an InfluxQL query

> CREATE DATABASE mydb
> USE mydb
Using database mydb
> INSERT temperature,airport=SFO,measure=celsius value=13
> SELECT * FROM temperature
name: temperature
time                airport measure value
----                ------- ------- -----
1544624439553551126 SFO     celsius 13
Step 5: Clean up
Once you’re done testing, don’t forget to clean up by running terraform destroy.
Next steps
The example you just tried is a great way to experiment with TICK Stack and the terraform-google-influx modules, but it’s not necessarily the way you’d deploy the components in production. In a production environment, you’d want to run each component and InfluxDB Enterprise with meta and data nodes in separate Instance Groups, so you can scale each separately. For an example of a production-like setup, see the TICK Enterprise Example.
Check out the terraform-google-influx repo for more documentation, examples and the source code of the example used in this blog post. You should also browse through the full list of available submodules to get a sense of all the ways you can use this repo. Take the code for a spin and let us know how it works for you!
Get your DevOps superpowers at Gruntwork.io.


- No-nonsense DevOps insights
- Expert guidance
- Latest trends on IaC, automation, and DevOps
- Real-world best practices


